Wether your working in a small or large environment, storage space is something that you have to take into account. The standard size of templates for AppStacks and Writable Volumes are 20 and 10GB. When the applications you want to deliver to the desktops don’t require more than 2 or 5GB, why use a template with the size of 20GB?
In this blog I will guide you in how to create a new AppStack template and change it to the size you need for your environment.
Before we go into depth, make sure you have a clean Windows virtual machine without the App Volumes Agent installed. This can be any virtual machine with Windows 7 or higher installed.
When your ready, complete the following steps to create and size a new AppStack template.
- Logon to your vSphere Web Client.
- Ensure the virtual machine is powered off.
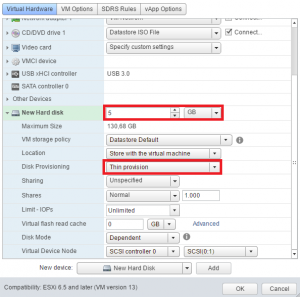
- Select the clean Windows virtual machine and go to Actions > Edit Setting.
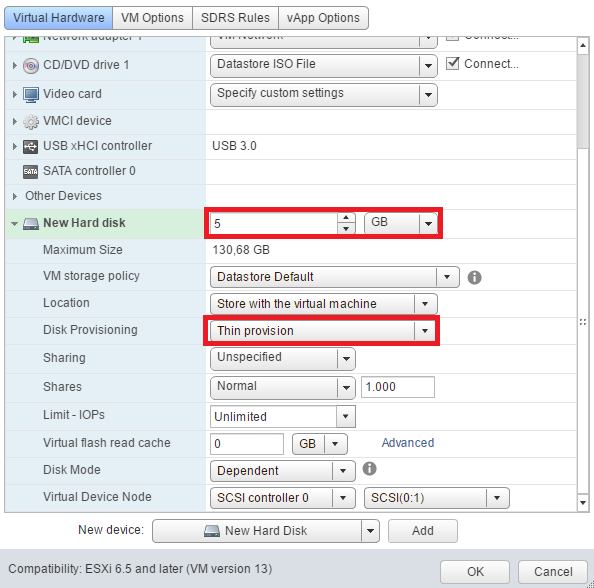
- Add a new thin-provisioned disk and specify the new size. You can specify it from 512MB up to 100GB or more to fit your needs. In my case I specified 5GB.
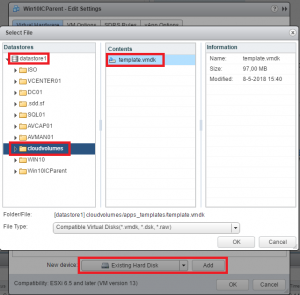
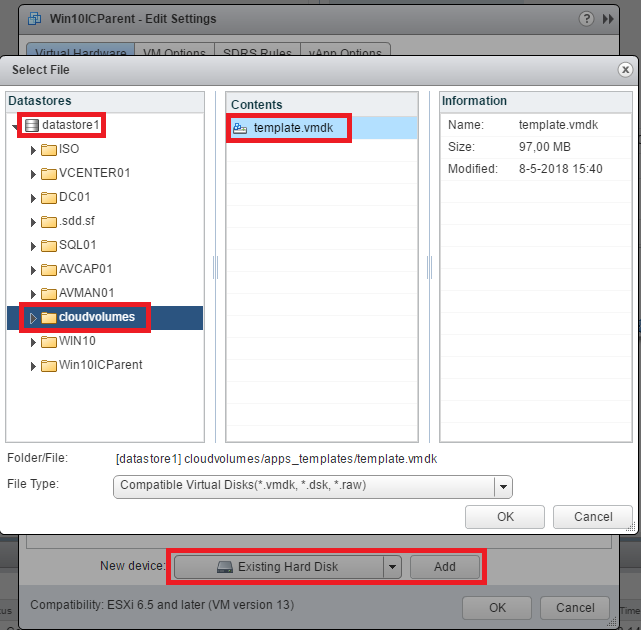
- After adding the new disk, you also need to add the existing template.vmdk to the virtual machine. You can find the template.vmdk in the /cloudvolumes/apps_templates/ folder on your datastore.
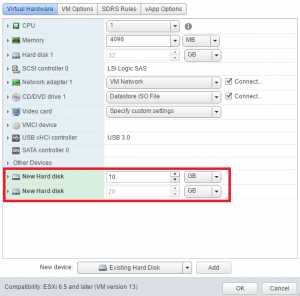
- When both disks are added, click OK to reconfigure the virtual machine.
- Power up the virtual machine and logon with an administrative account.
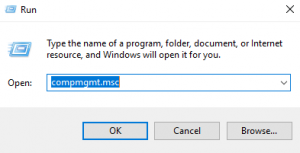
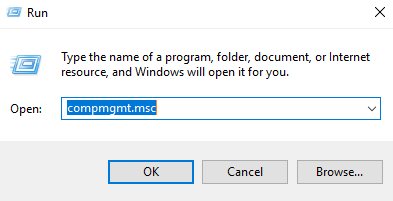
- Click Windows > Run and type compmgmt.msc
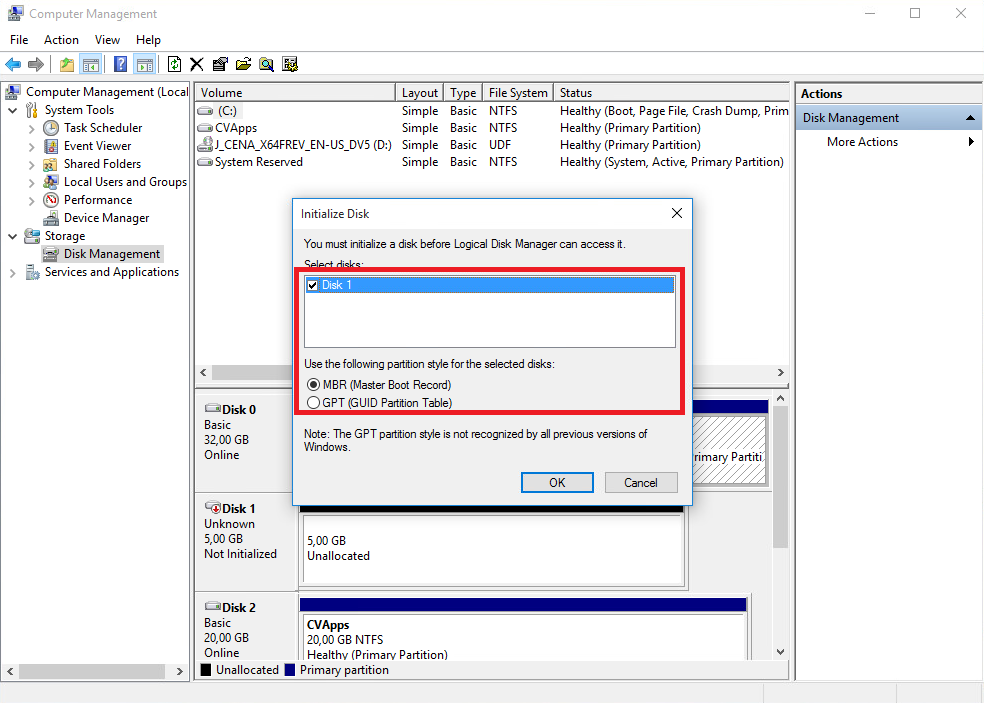
- From the left navigation pane, select Storage > Disk Management. The Initialize Disk window launches automatically.
- Initialize the new drive by selecting MBR (Master Boot Record) and then click OK.

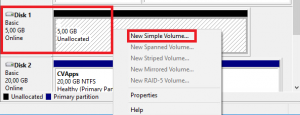
- Right-click the new disk and click New Simple Volume.
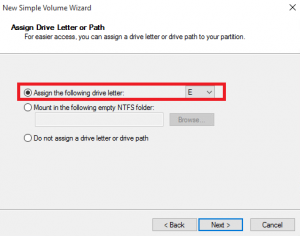
- Navigate through the New Simple Volume wizard, click Next and specify volume size and a drive letter.
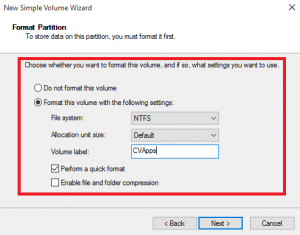
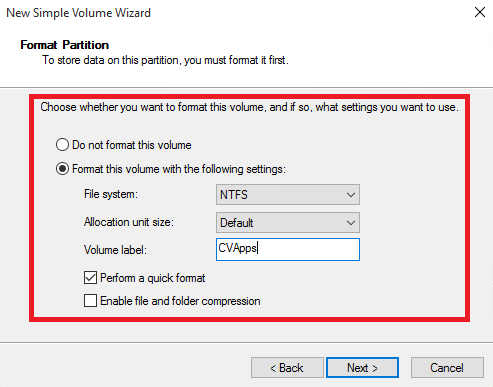
- In the Format Partition window, set File System to NTFS, set Volume label to CVApps (same as the existing template), and select Perform a quick format and then click Next and Finish.
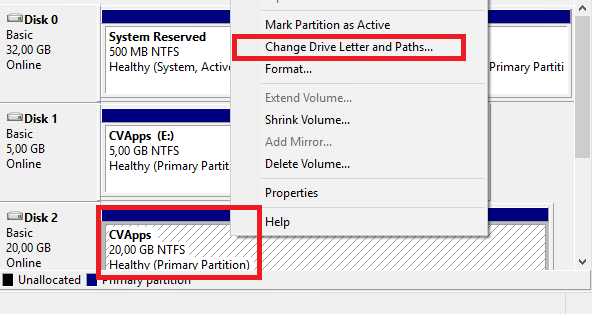
- Right click on the original CVApps disk (20GB) and assign a drive letter.

- Open Windows Explorer and go to View > Options > Change folder and search options.
- Select Show hidden files, folders, and drives.
- Ensure that these options are not selected:
- Hide empty drives in the Computer folder
- Hide extensions for known file types
- Hide protected operating system files (Recommended)

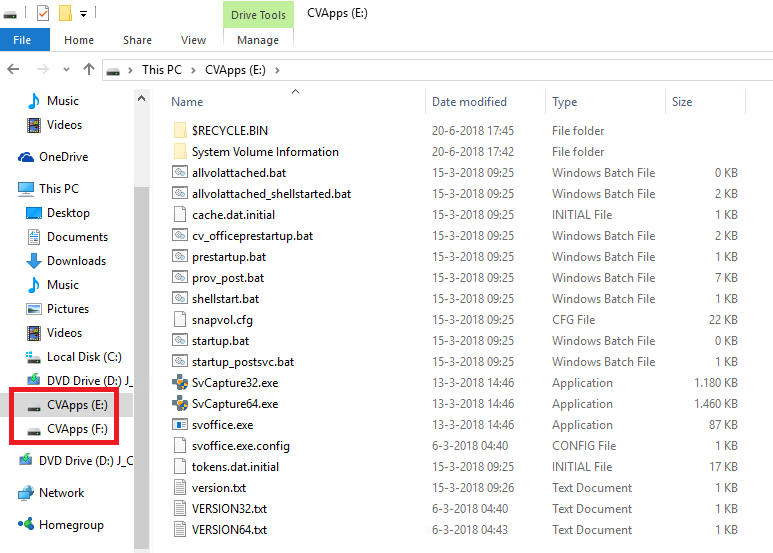
- Copy all the files and folders from CVApps(E:) in to the new drive. In my case, CVApps(F:).

- Shutdown the virtual machine
- Select the virtual machine and go to Actions > Edit Setting.
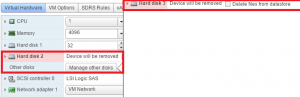
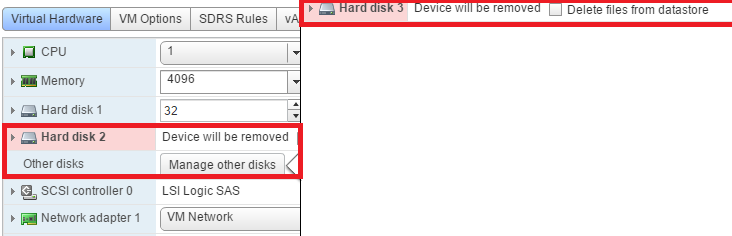
- Detach both hard disk 2 and 3 by hovering over the disk and click the X button on the far right.
Note: Do not check the Delete files from datastore checkbox!
- Click OK to reconfigure the virtual machine.
- In the vSphere Web Client, click the Storage tab, select the datastore and open the file browser.
- Copy the newly created VMDK from its current location (the virtual machine folder) in to the /cloudvolumes/apps_templates/ folder.
- Select the .VMDK file and rename is to your standards. In my case I renamed it to Templace_5G.vmdk

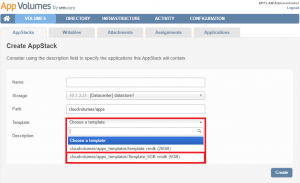
- Logon to the App Volumes Manager.
- Click Volumes > Create. And as you can see, the new template is immediately available.


You now have created and sized a new AppStack template, you can repeat the same steps if you want to change the size of a Writable Volume.


Je moet ingelogd zijn om een reactie te plaatsen.