What the App Volumes?
Over the past months I took a deep-dive into VMware App Volumes and this made me really exited about the future of Application Virtualization. VMware App Volumes, in a nutshell, is a virtualization product that provides just-in-time application delivery to virtualized desktop environments. With this real-time application delivery system, applications are delivered to virtual desktops through AppStacks, without modifying the VM or applications themselves. AppStacks are VMDK virtual disks that contain one or more applications that can be assigned to a users depending on how the applications are managed.
In this article I will tell my story to share my experience and guide you trough the steps on how to create, provision, edit, assign, unassign and update AppStacks, all explained in separate chapters. This means that you need to have your VMware App Volumes environment set up. Click here if you need guidance on how to create your own VMware App Volumes environment.
Once you have your VMware App Volumes environment set up, follow the steps below to create an App Volumes AppStack.
How to: Create an AppStack
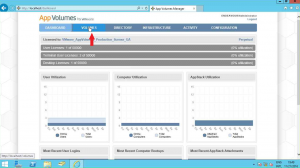
- Log in to the App Volumes Manager interface.
- Click on the Volumes tab.
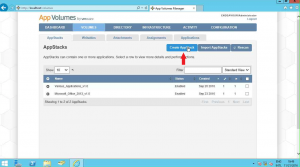
- Click on the Create AppStack button.
- Give the AppStack a name and description (optional) and click Create.
Note 1: If you have multiple storage locations you can select the location you desire, in this case I only have one storage location so the default location is automatically selected for me.
Note 2: When naming AppStacks, please bear in mind that you will install multiple applications on one AppStack. So think of a name where multiple applications can refer to. In this case I use notepad ++ as example. Because this is a commonly used office application I named the AppStack: Office_Applications_v1.0
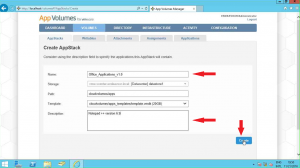
- Before the AppStack is created you can choose to let it perform in the background or wait for completion. I’ve selected to wait for completion and clicked Create.

- vCenter will now create a new VMDK for the AppStack to use. When done the AppStack is shown in the App Volumes Manager with the status “unprovisioned“.
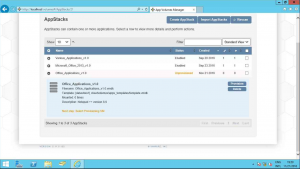


You have now successfully created an AppStack! Continue here to provision the AppStack onto your provisioning machine.
VMware App Volumes and AppStacks:
– Chapter one: Create an AppStack
– Chapter two: Provision an AppStack
– Chapter three: Capture an application
– Chapter four: Edit an AppStack
– Chapter five: Assign an AppStack
– Chapter six: Unassign an AppStack
– Chapter seven: Update an AppStack


Je moet ingelogd zijn om een reactie te plaatsen.