In my previous blog post, I explained how a couple of options to install the Carbon Black sensor. If the sensor is successfully deployed, the machine will be shown on the Carbon Black Cloud Management page. But how does this work with VDI and especially in a non-persistent environment?
In this blog post, I’ll explain what you need to do to have accurate information about your VDI desktops.
VDI Policy
Before we install the CB sensor in the golden image, we need to create a VDI policy for our non-persistent desktop pools. Log into the CBC Management page and go to Enforce > Policies and click New Policy.
Enter a name for the policy, an optional description, set the target value to Medium, and enter a Sensor UI Message.

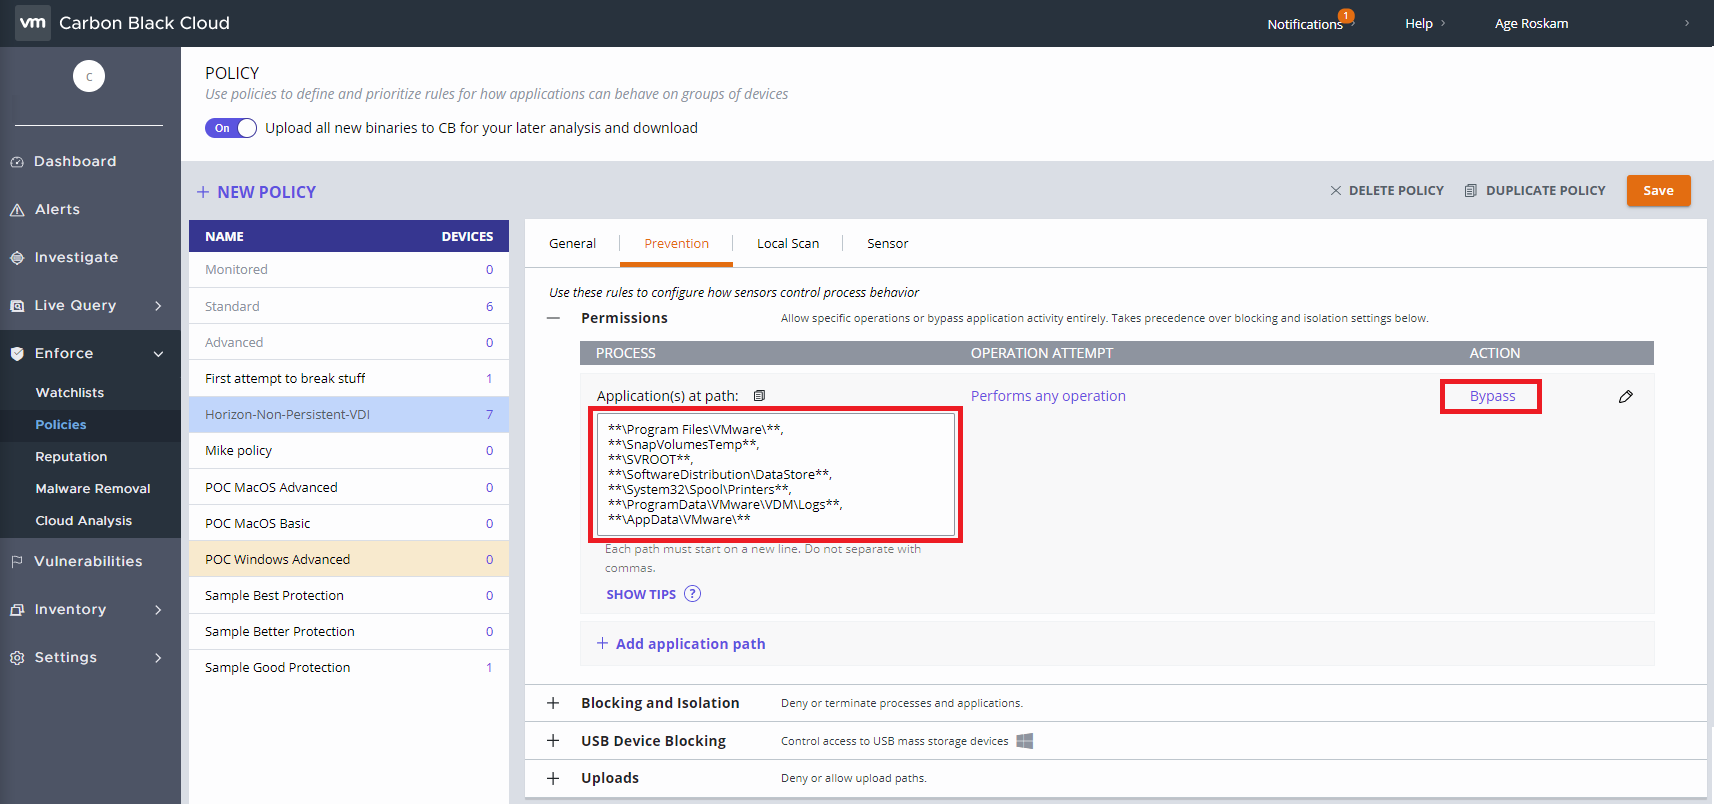
On the “Prevention” tab, we need to configure a couple of bypass rules to help achieve stability in the VDI environment. As every organization is different, you should work with your stakeholders to review risks and benefits for your organization. Which will be a trade-off between performance and security.
In my case, I only add the best practices for the VMware products in my lab environment, so I added the locations listed below to the Application(s) field and check the Bypass checkbox for Perform any operation.
**\Program Files\VMware\**,
**\SnapVolumesTemp**,
**\SVROOT**,
**\SoftwareDistribution\DataStore**,
**\System32\Spool\Printers**,
**\ProgramData\VMware\VDM\Logs**,
**\AppData\VMware\**
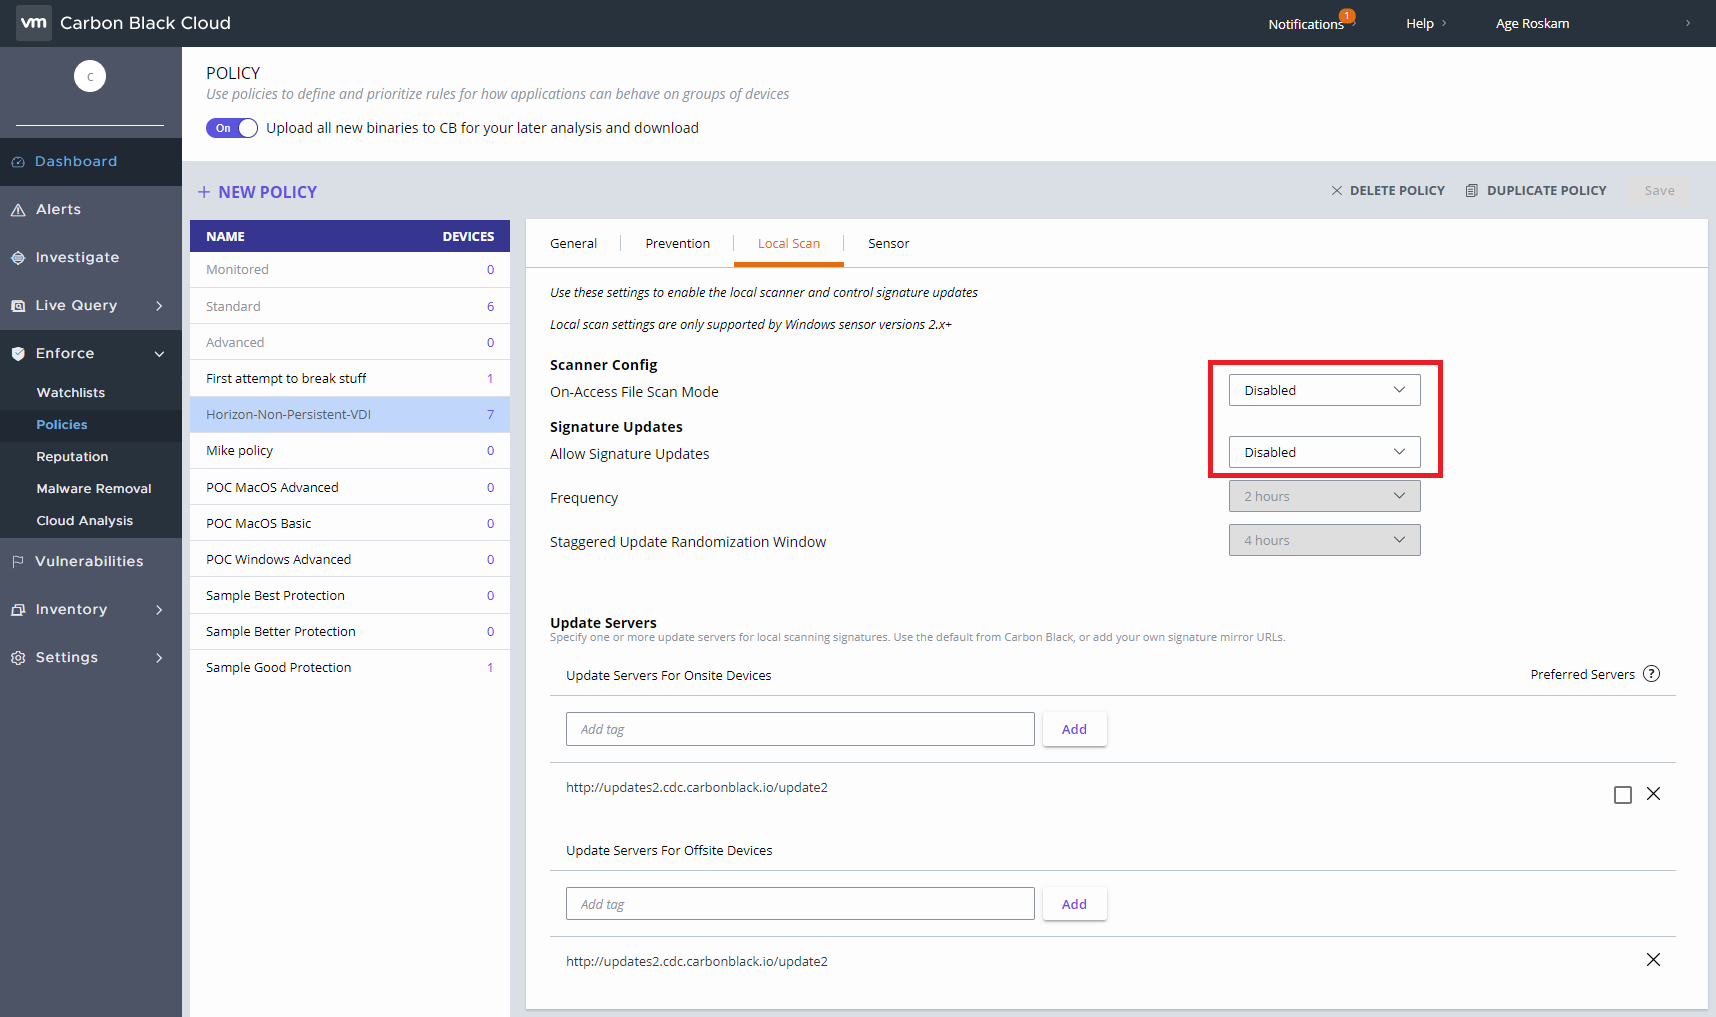
On the “Local Scan” tab set the options On-Access File Scan Mode and Allow Signature Updates to Disabled. This is a best practice because the local scan feature adds network overhead and augments resource utilization. The Carbon Black Cloud can pull reputation and enforce policy in real-time from the Cloud because most VDI environments maintain 99% uptime.
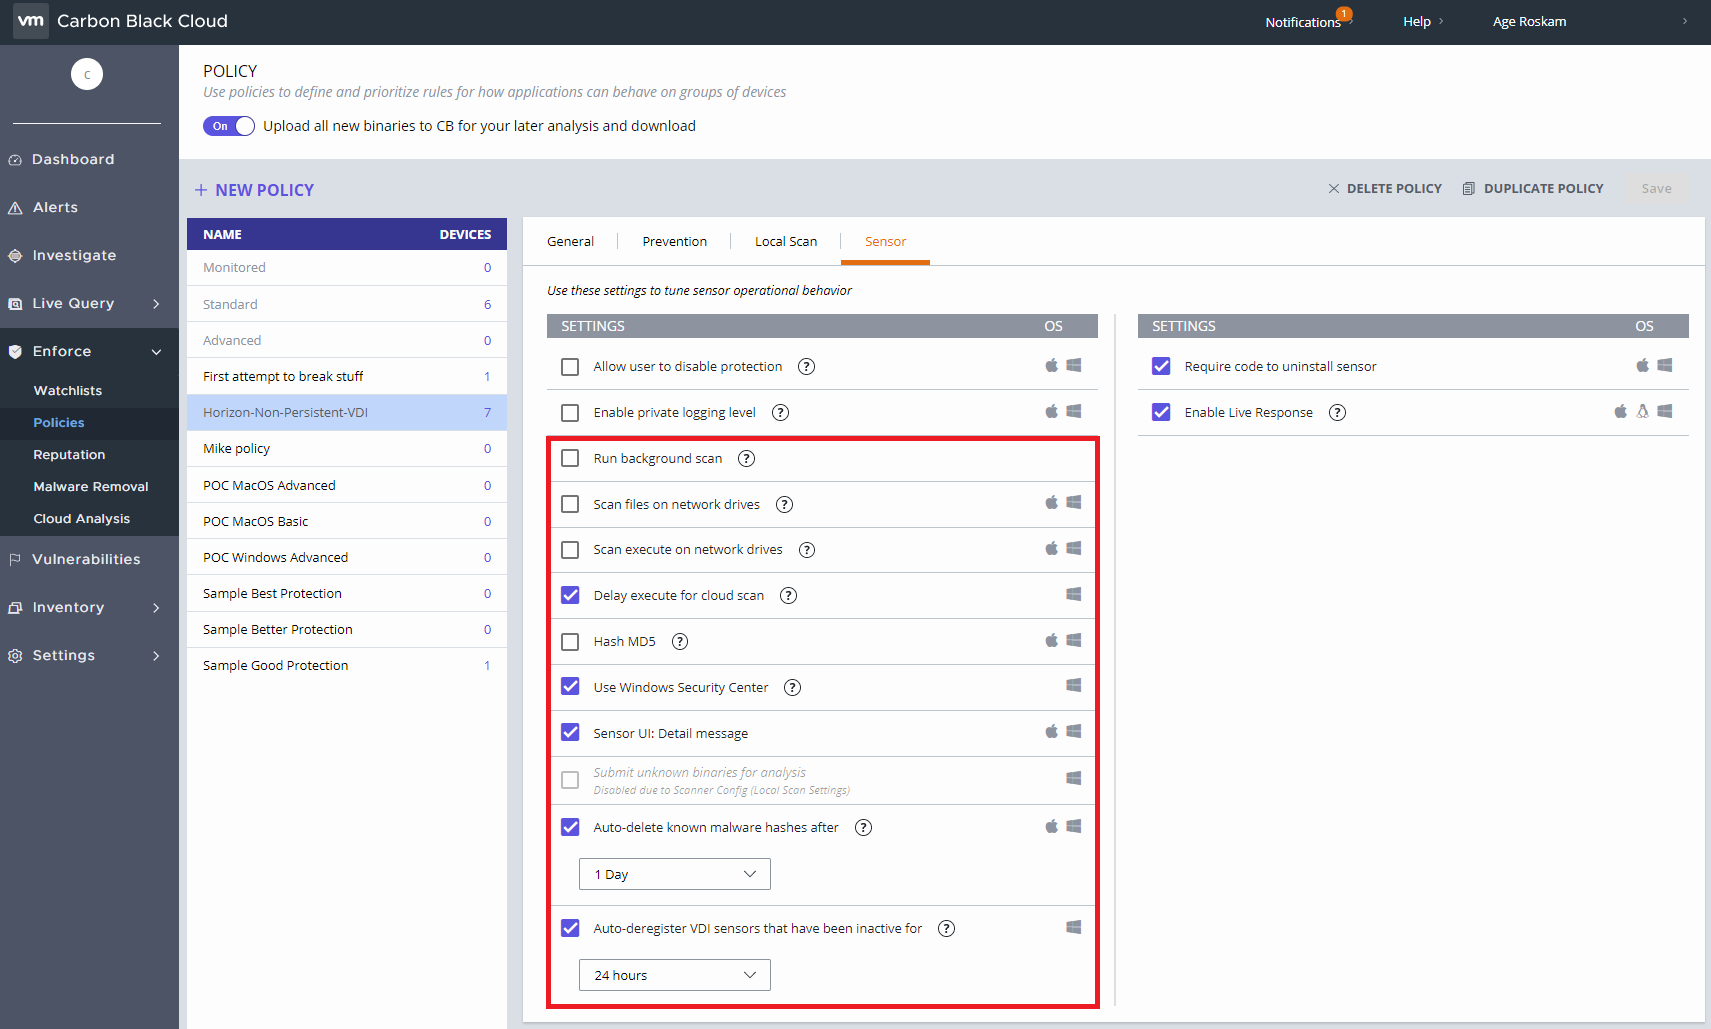
Last but not least, we need to configure the “Sensor” tab. The following settings are also best practices for VDI environments and can also be found in the VMware Carbon Black documentation.
Configure the settings as listed below:
Run Background Scan – Disabled
Scan files on network drives – Disabled
Scan execute on network drives – Disabled
Delay execute for Cloud scan – Enabled
Hash MD5 – Disabled.
Auto-deregister VDI sensors that have been inactive for – Hours, days, or weeks. I’ve set it to 24 hours. This is a non-persistent setting, it’s recommended that you enable this setting to remove any clones that been inactive for the specified
duration.
This concludes the creation of the non-persistent VDI policy for Carbon Black. In the next part, I’ll go through the installation process of the sensor in the golden image.
Golden Image
Before we can install the sensor there are a couple of things we need to gather.
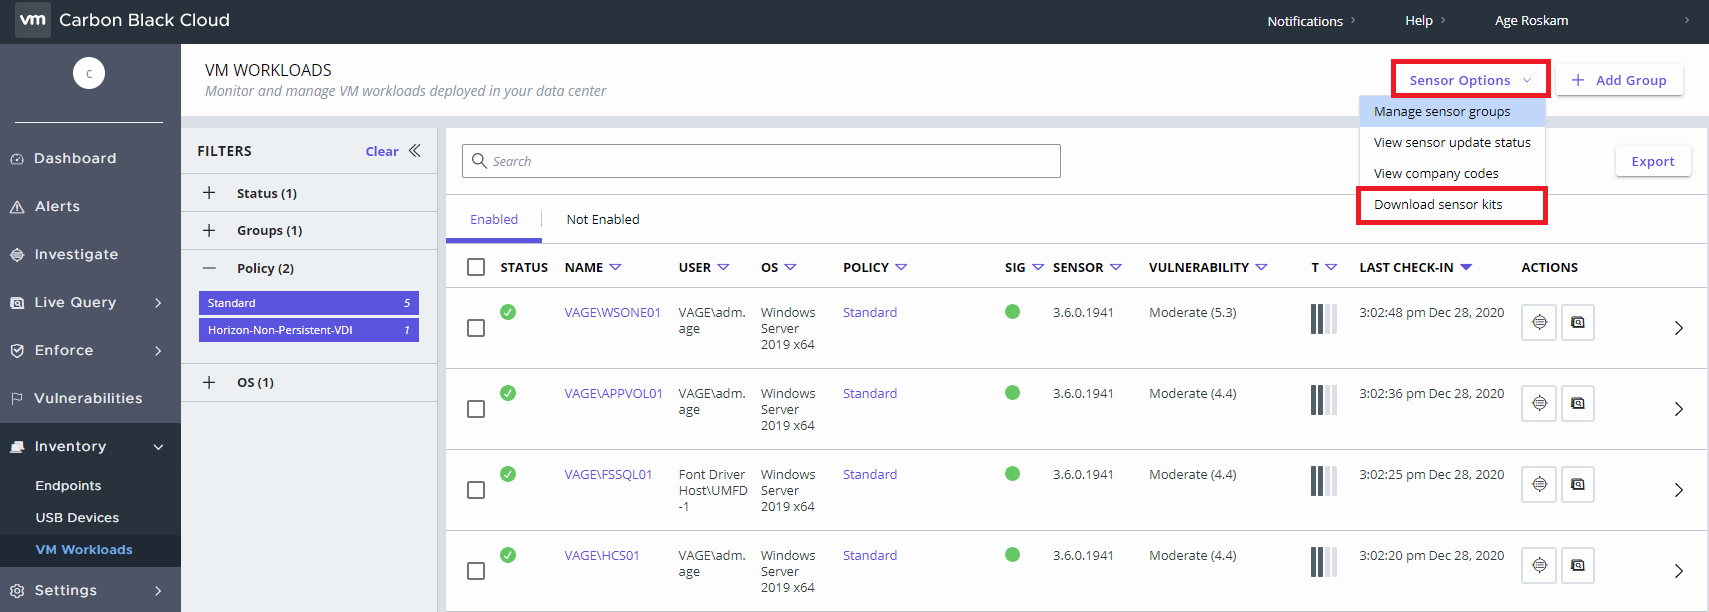
First of all, we need to download the .MSI file from the CBC Management page. Go to Inventory > VM Workloads and click Sensor Options > Download Sensor Kits.
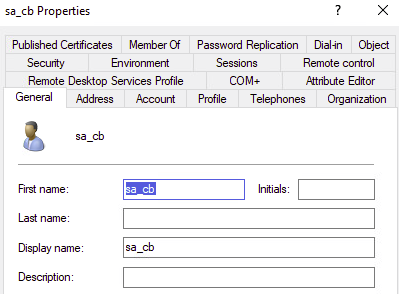
Second, we need to find create a group or user that will be used to enable REP_CLI on the clones to reregister the device in Carbon Black Cloud. I have created a service account that I will use in my environment. The account can be a normal user account with no admin permissions.
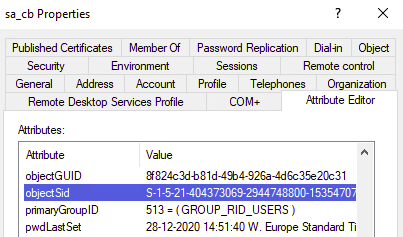
Go to the Attribute Editor tab and copy the user SID to a notepad.
Last, we need to get the company code from the Carbon Black Cloud Management page. On the management page go to Inventory > VM Workloads, then click on Sensor option > View Company Codes and copy the code to the same notepad as the user SID.

Now we have all the information we need to configure the command line for the CB Sensor installation. In this example, I run the installation command by hand, but I would suggest adding the MSI file with the command line to any type of deployment tool in your organization.
To install the CB Sensor you need the following command line:
msiexec.exe /q /i <Sensor Installer Path> /L* msi.log COMPANY_CODE=”XYZABC” CLI_USERS=sid GROUP_NAME=”<NAME Virtual Policy>” AUTO_UPDATE=0
Copy/paste your Company Code, the user SID of the service account in the command line and fill in the Name of the Carbon Black VDI policy we’ve created previously.
It should look like this:

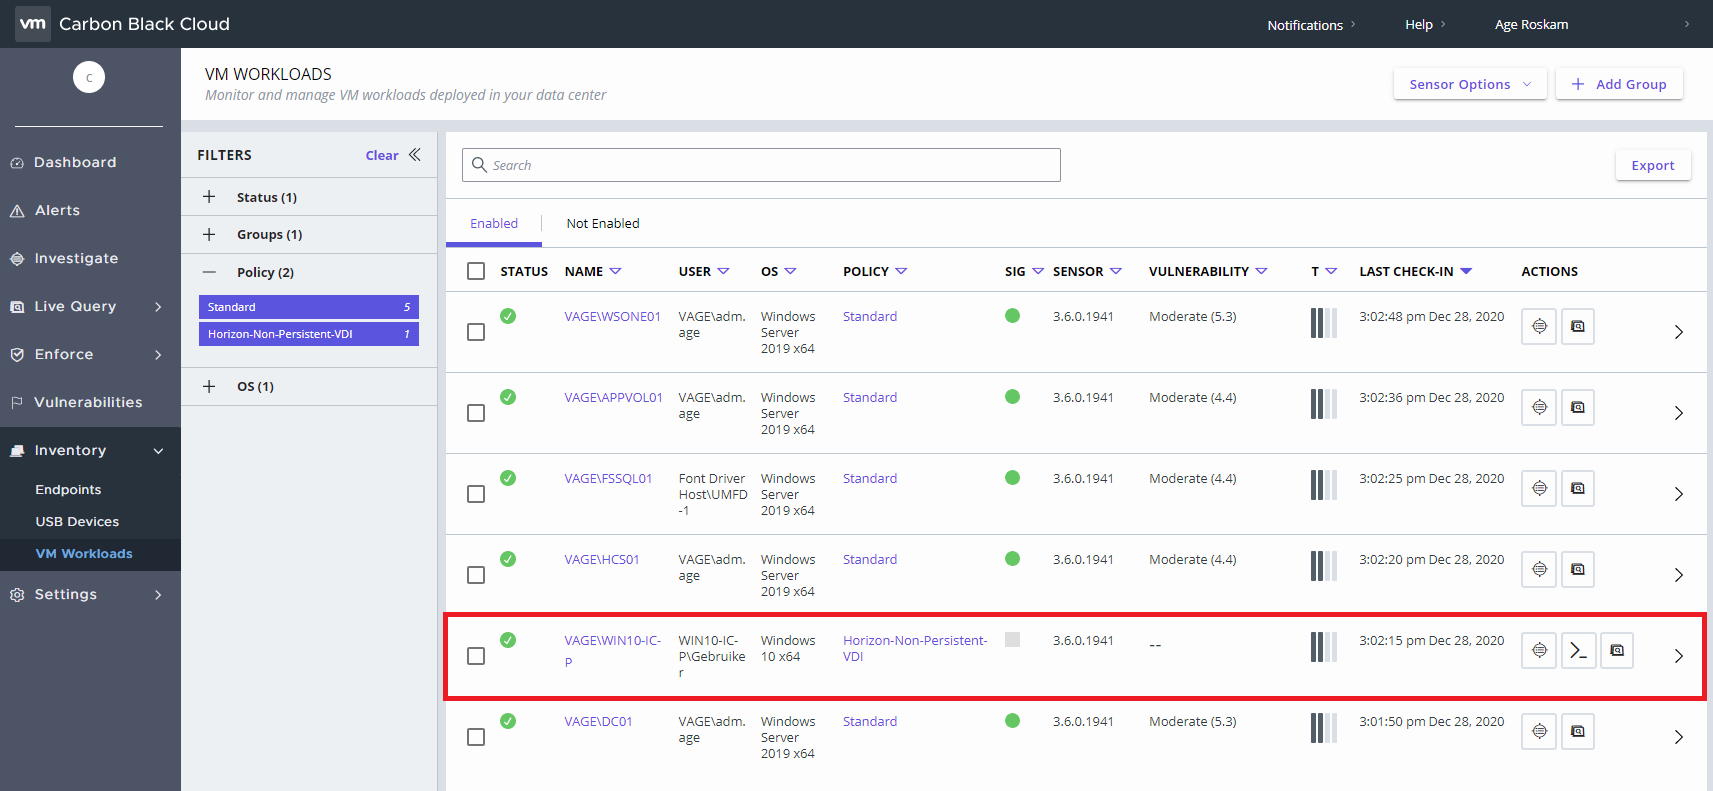
Running the command line will register the golden image to the Carbon Black Cloud. Check the CBC management page for the name of the VM.
Now shut down the machine and take a snapshot.
To finalize this part, create an Instant Clone pool with the golden image and snapshot in the Horizon Management Console. Now every time a new clone is made, the sensor will automatically be registered in the Carbon Black Cloud with the right VM name and device id.
De-Register and remove unused sensors
Because Instant Clones are recreated all the time, the same VM name will be registered on the CBC Management page multiple times, but with another device id. As you can imagine, this will become a big mess. To prevent this from happening, we already took the first step by configuring the “Auto-deregister VDI sensors that have been inactive for” setting in the VDI policy.
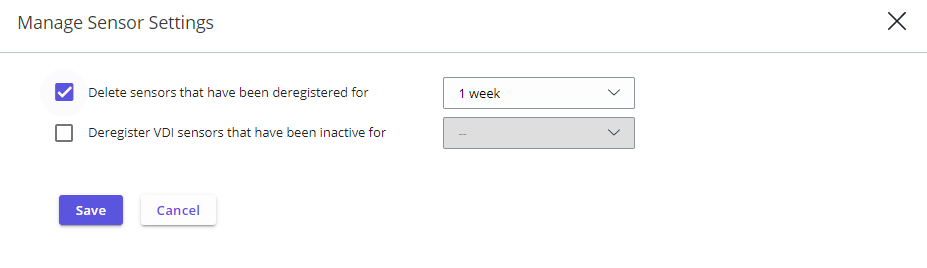
De-registration is not enough, because the sensor will still be displayed on the CBC Management page. To keep a clean overview of all the active sensors you can also auto-delete unused sensors from the management page. You should consult with your stakeholders how long you want to keep this data on the management page, I’ve set mine to 24 hours.
To configure this setting, go to Inventory > Endpoints and click Sensor Options > Manage Sensor Settings. Here you can configure the Delete sensors that have been deregistered for: setting.
Conclusion
When you have followed the instructions above, your non-persistent desktop pools are now fully secured by VMware Carbon Black. With the right configuration of the VDI policy and sensor settings, the management page will be a clean sheet of actual information of every running VDI. With this basis, you can now play around with the policy to secure your VDI environment even more! If you have any questions or have an interest in VMware Carbon Black, feel free to contact me in any way.


Je moet ingelogd zijn om een reactie te plaatsen.