In 2019 VMware announced the acquisition of Carbon Black. At that time my interest in security products was a bit “meh”. It was at VMworld 2020 this year where the words “Intrinsic Security” triggered my attention as I watched one of the keynotes from home. I then decided to add some of the security sessions to fill the empty spots in my agenda, and this is where my interest in Carbon Black started to grow.
A couple of weeks later at ITQ, the opportunity came up to do the VMware Carbon Black – Configure and Manage training, so I signed up and started to absorb the knowledge. After successfully completing the training I started to play around in my lab environment, so this is hopefully the first of many blogs to get you started with Carbon Black as well!
In this blog, I’ll explain how to enable Carbon Black Cloud Workload Protection by installing and configuring the server appliance. For this, I’ll use my home lab environment and an ITQ Carbon Black Cloud test environment I have access to.
From here on, I’ll use the abbreviation CBCW for Carbon Black Cloud Workload.
Installation of the Carbon Black Cloud Workload Server Appliance
First of all, we need to download the CBCW server appliance .ova file from my.vmware.com.

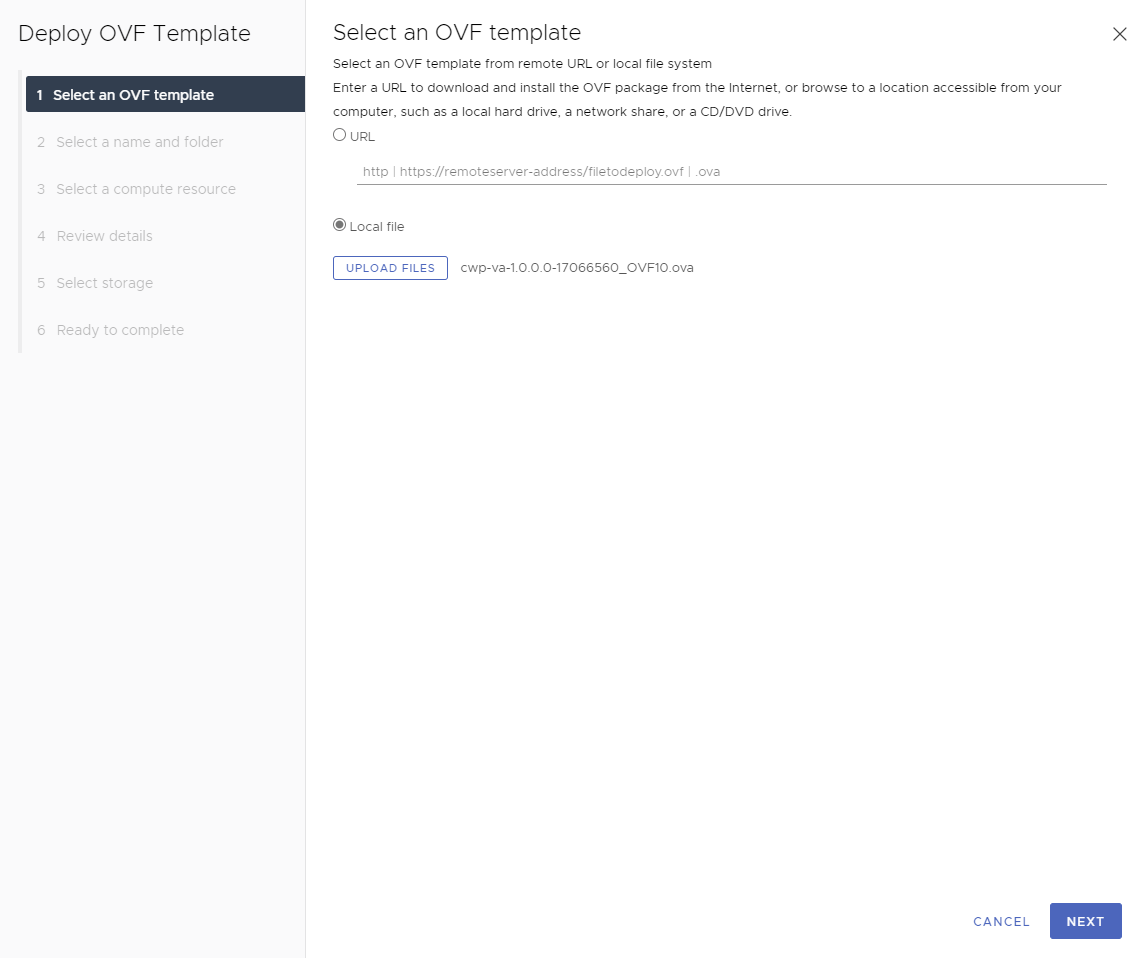
After downloading the .ova file, open your vCenter management console and start “Deloy OVF Template”. Select the Local File radio button and click Upload Files. Select your downloaded CBCW Server Appliance .ova file and click Next to continue.
Enter the name of the CBCW Server Appliance and click Next.

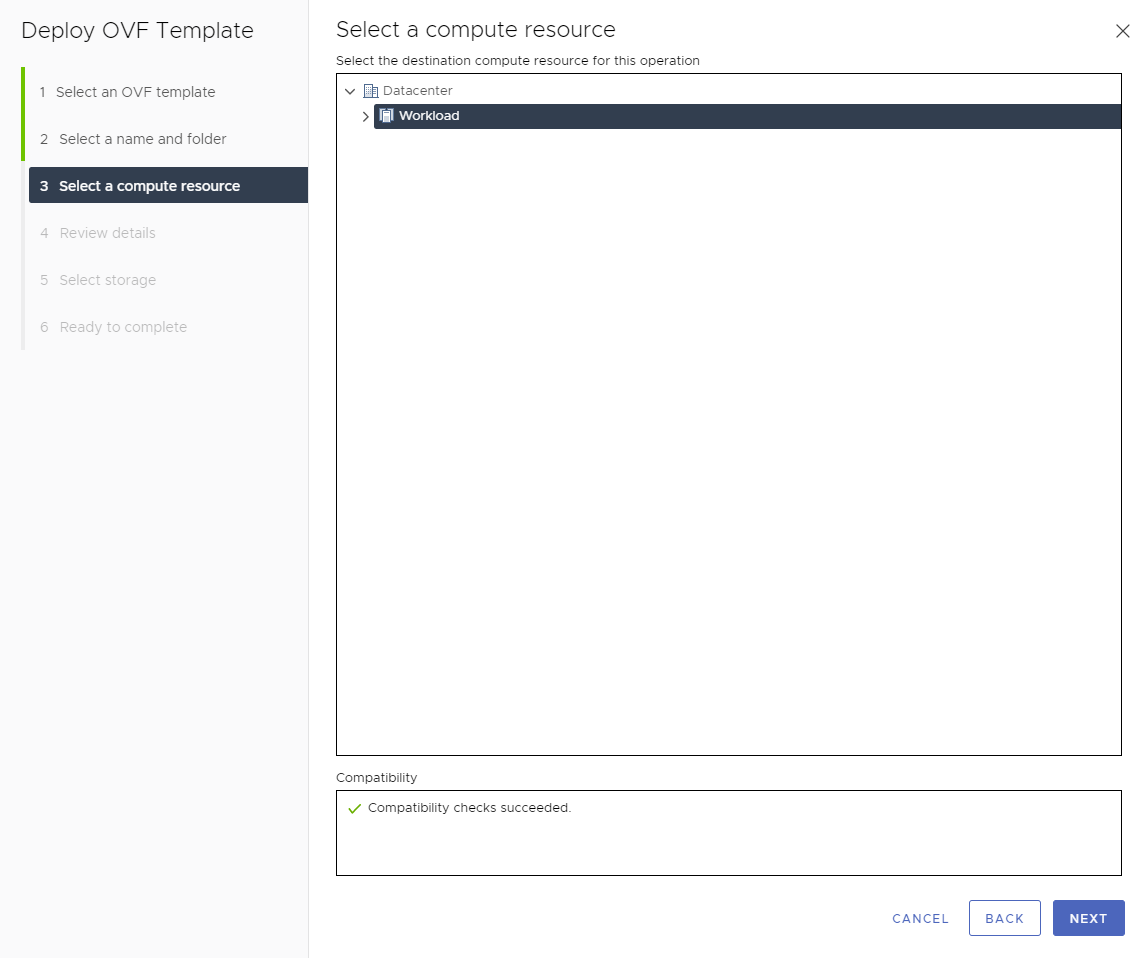
Select the cluster or host where you want to deploy the appliance to and click Next.
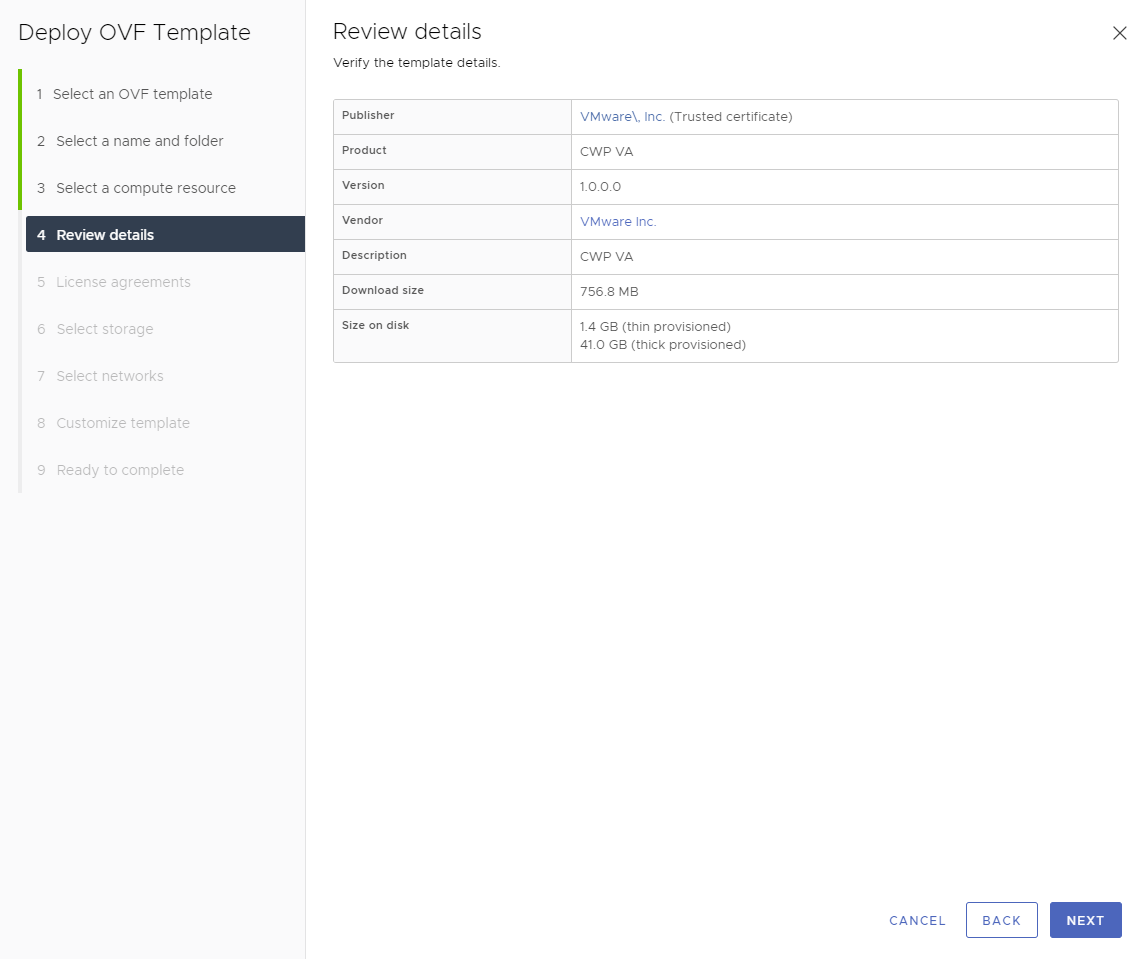
Click Next.
Accept the license agreement and click Next.

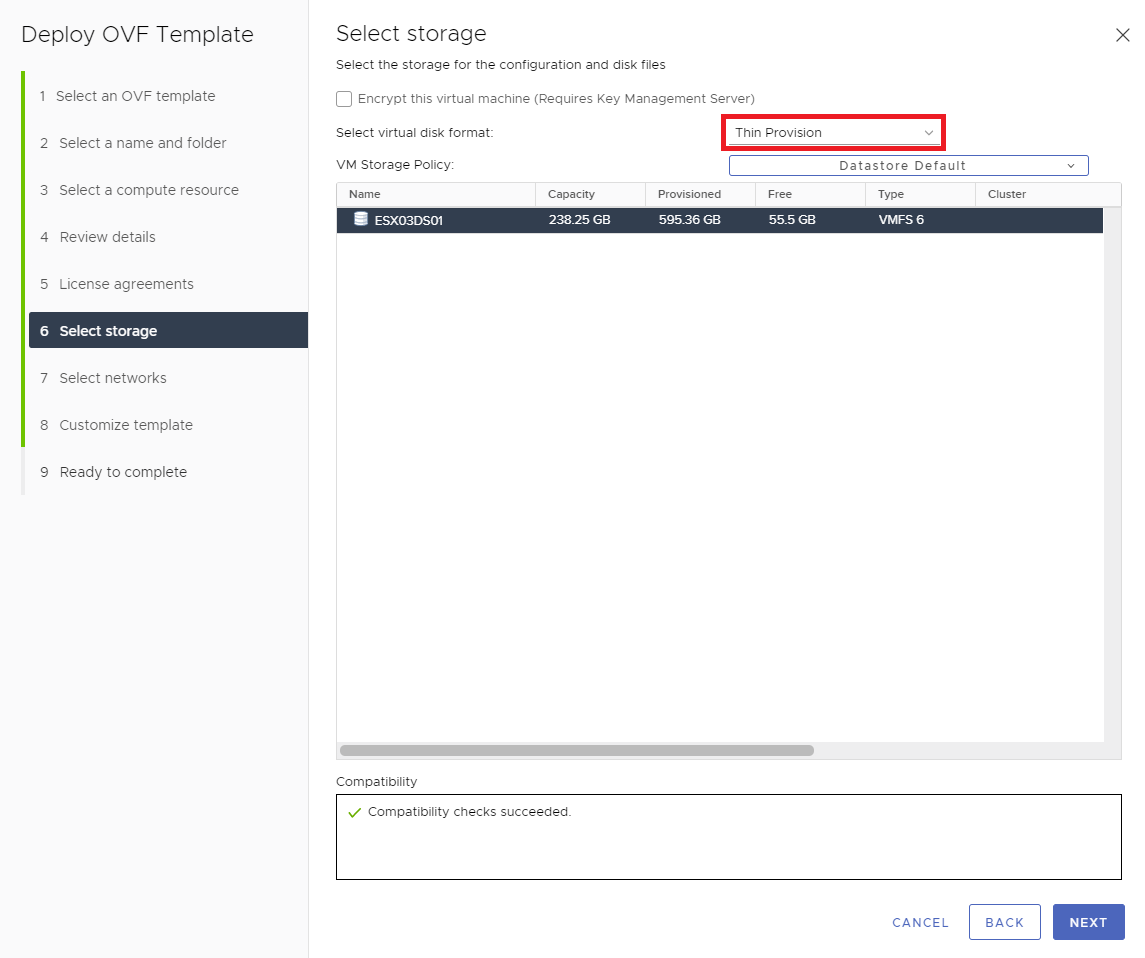
Select a datastore, select Thin Provision, and click Next.
Click Next.

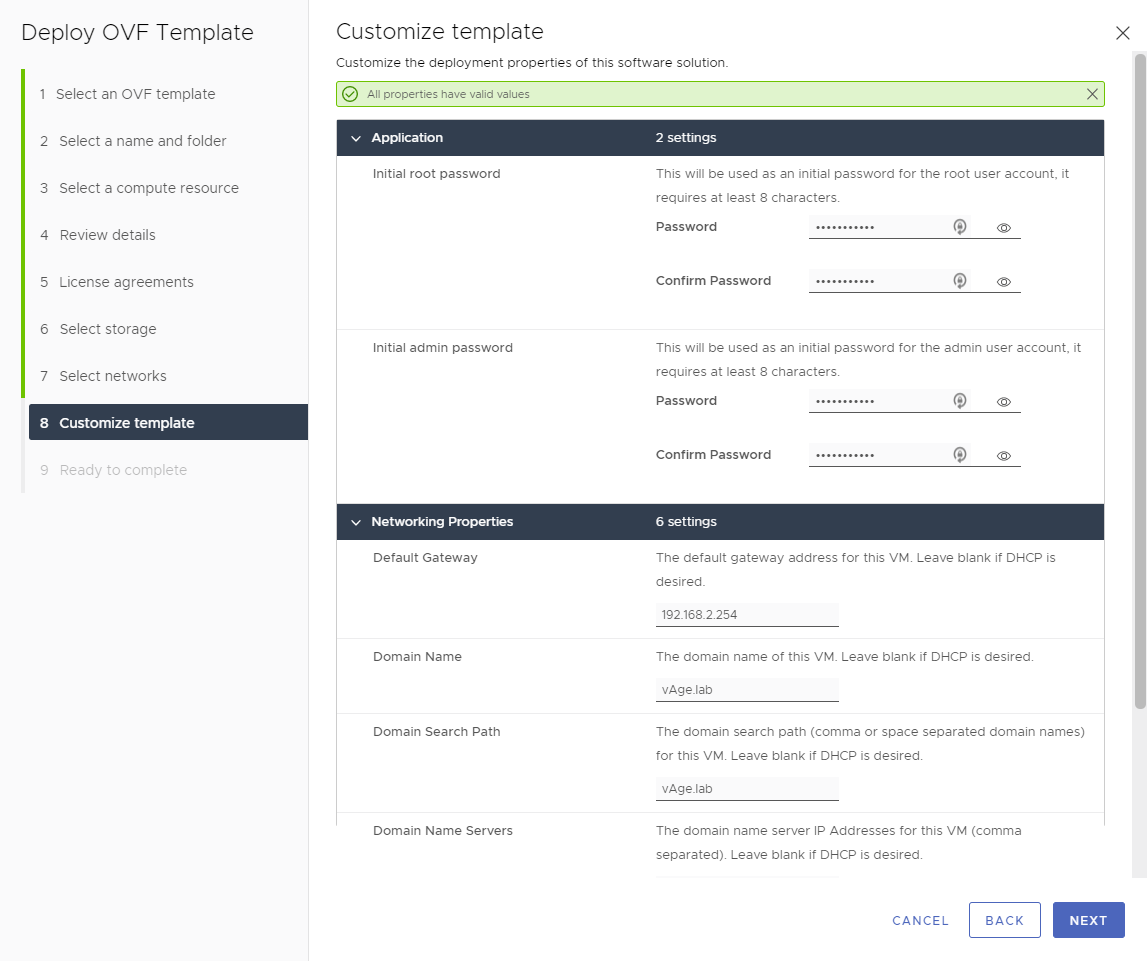
Here you will need to create a password and enter some details like IP addresses and domain names. Fill in the required fields and click Next.
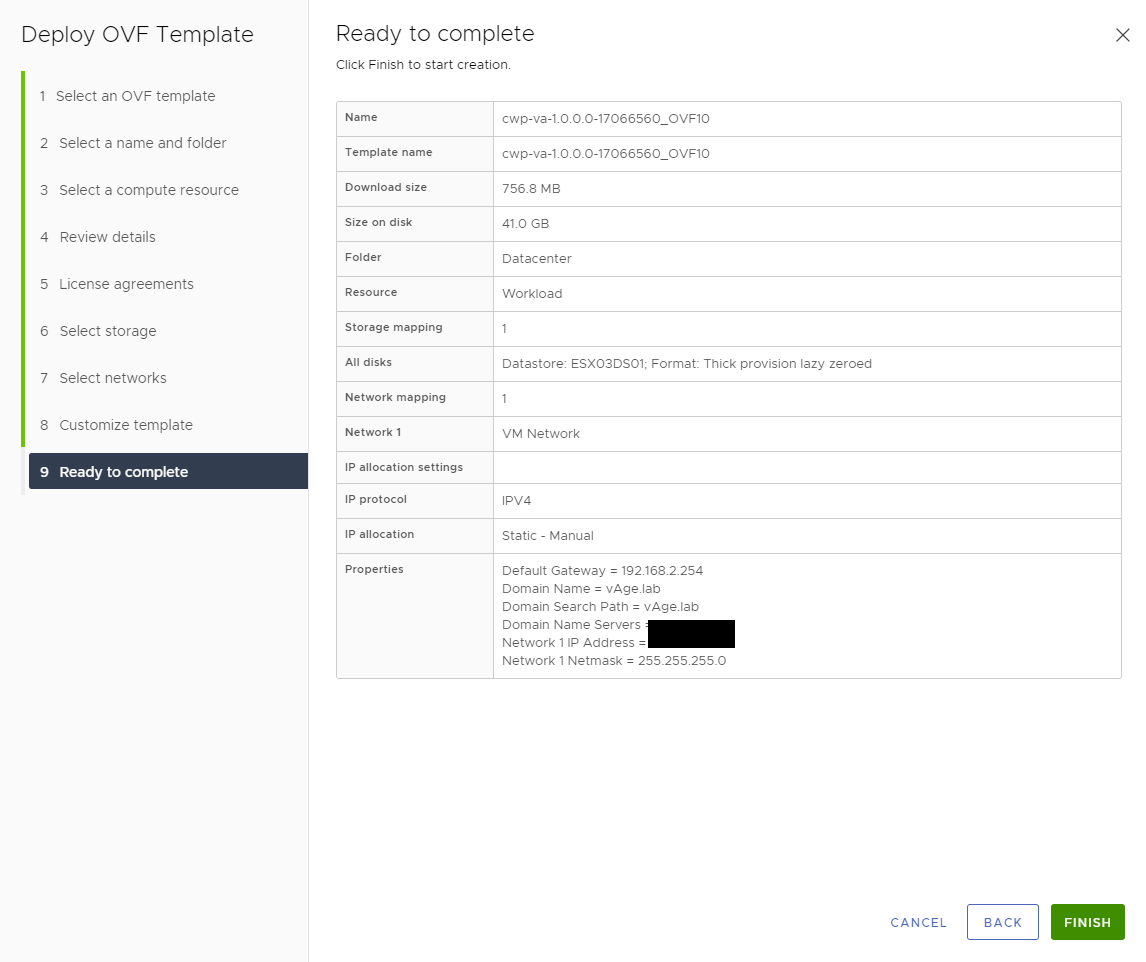
Review the summary and click Finish to start the installation.
The form will disappear and you can follow the progress in the vCenter management console.
![]()
Note: when the deployment is completed, it won’t give you a signal, and the CBCW server appliance will not start automatically.
Configure the Carbon Black Cloud Workload Server Appliance
As you can see the deployment of the server appliance is pretty straightforward. For the configuration, we start by powering on the CBCW Server Appliance and open the management page in a browser.
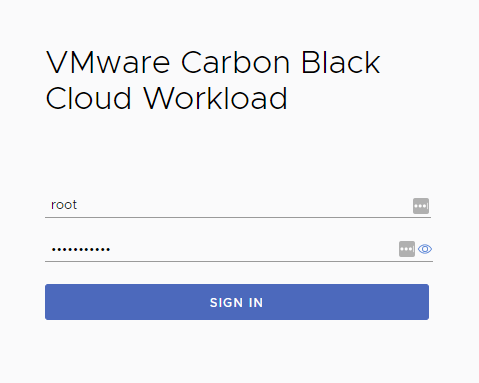
Open a browser and enter the <FQDN> of the Server Appliance. Log in with the root account and your created password.
When logged in, we first need to configure some settings before we can connect the appliance to the cloud. First of all, we need to configure time settings. Click the General tab, click Edit, Enter the IP address of your NTP server, and click Save.
![]()
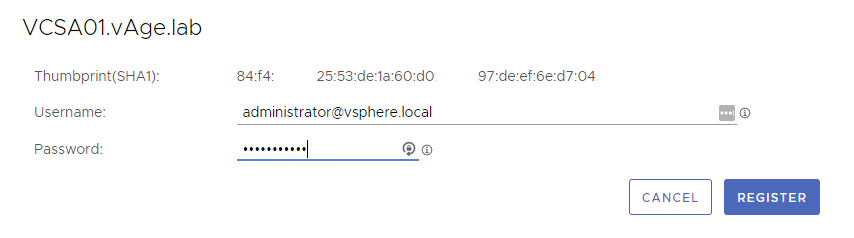
Select the Registration tab, click Edit in the top right corner, Enter the vCenter FQDN in the SSO Hostname field, and click Register.

A pop-up will appear and ask for your credentials. Enter the credentials of your vCenter Appliance, and click Register.
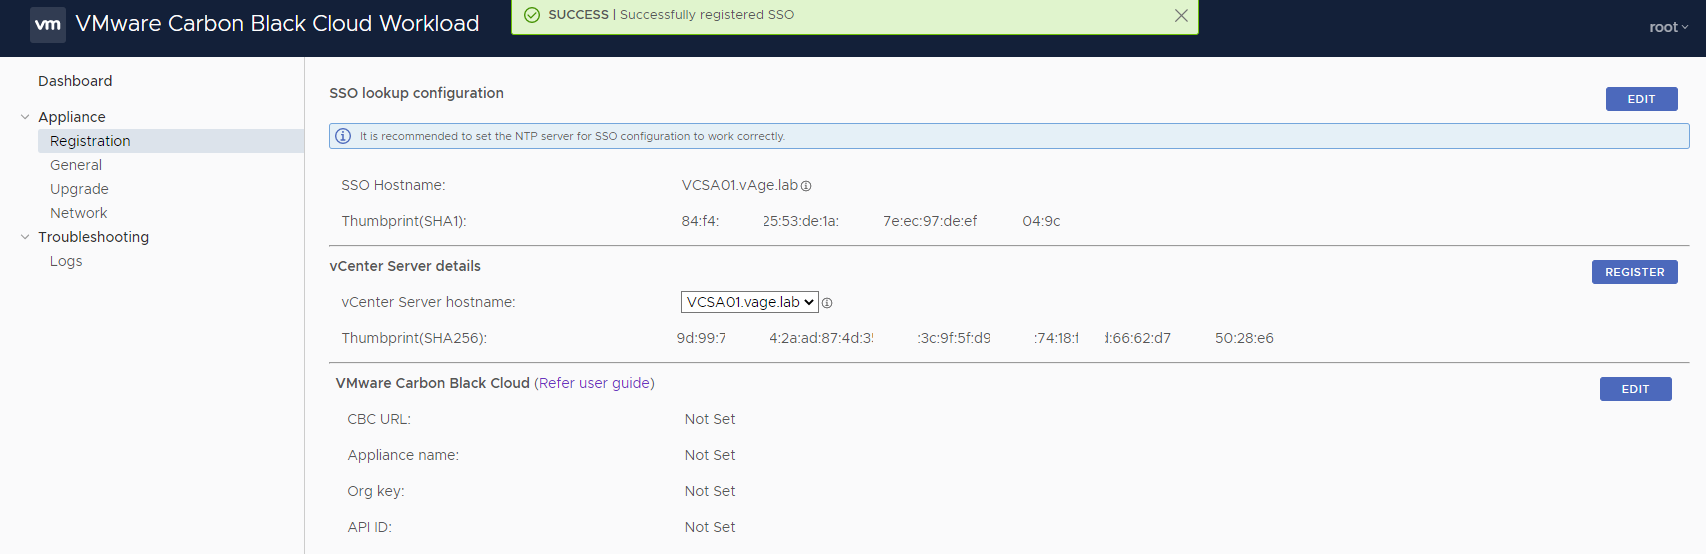
The green message in the top of your screen will tell you that the registration was successful and you are now able to register the vCenter Server details. Do this by clicking the Register button.
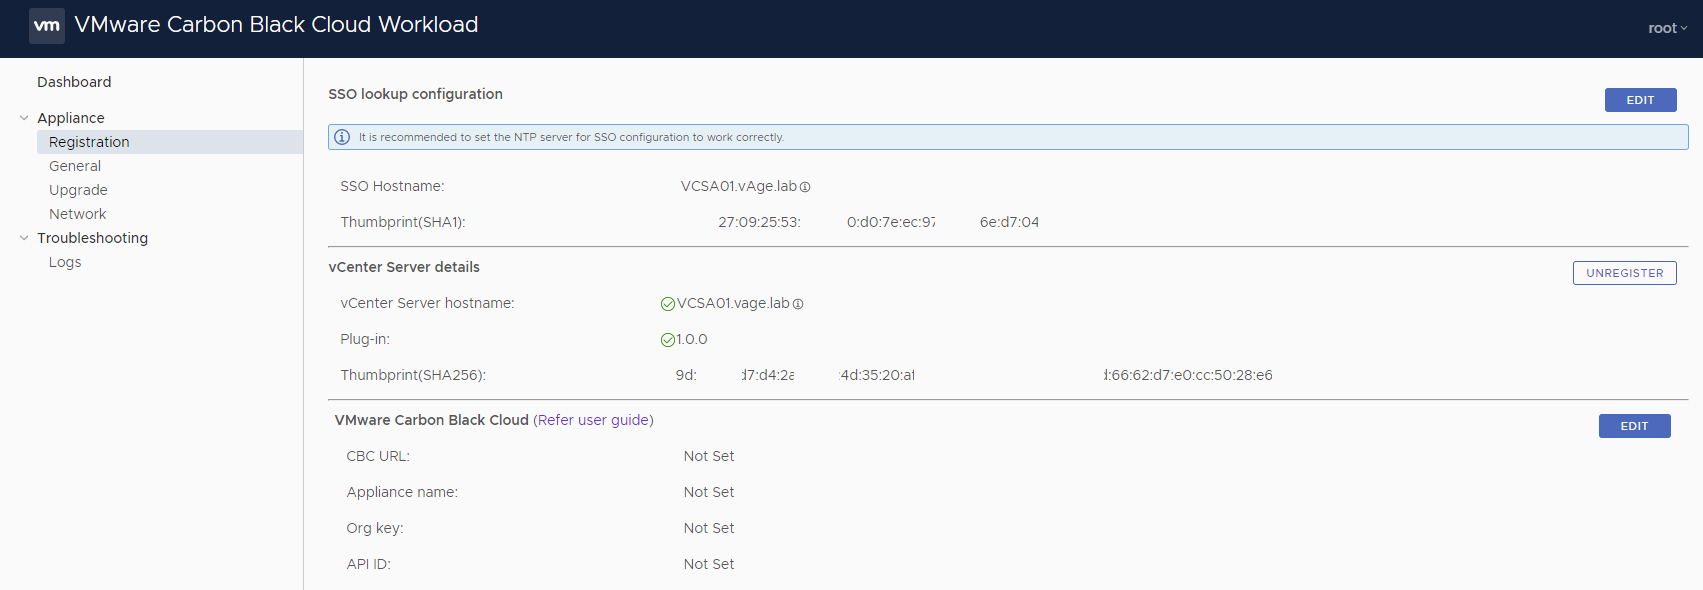
When the vCenter Server details are successfully registered the management page will show you two green checkmarks.
Now it’s time to head over to the Carbon Black Cloud Management page and set up the API key to connect your environment with the Carbon Black Cloud.Before we can create an API key we need to configure a new Access Level for the CBCW Server Appliance.
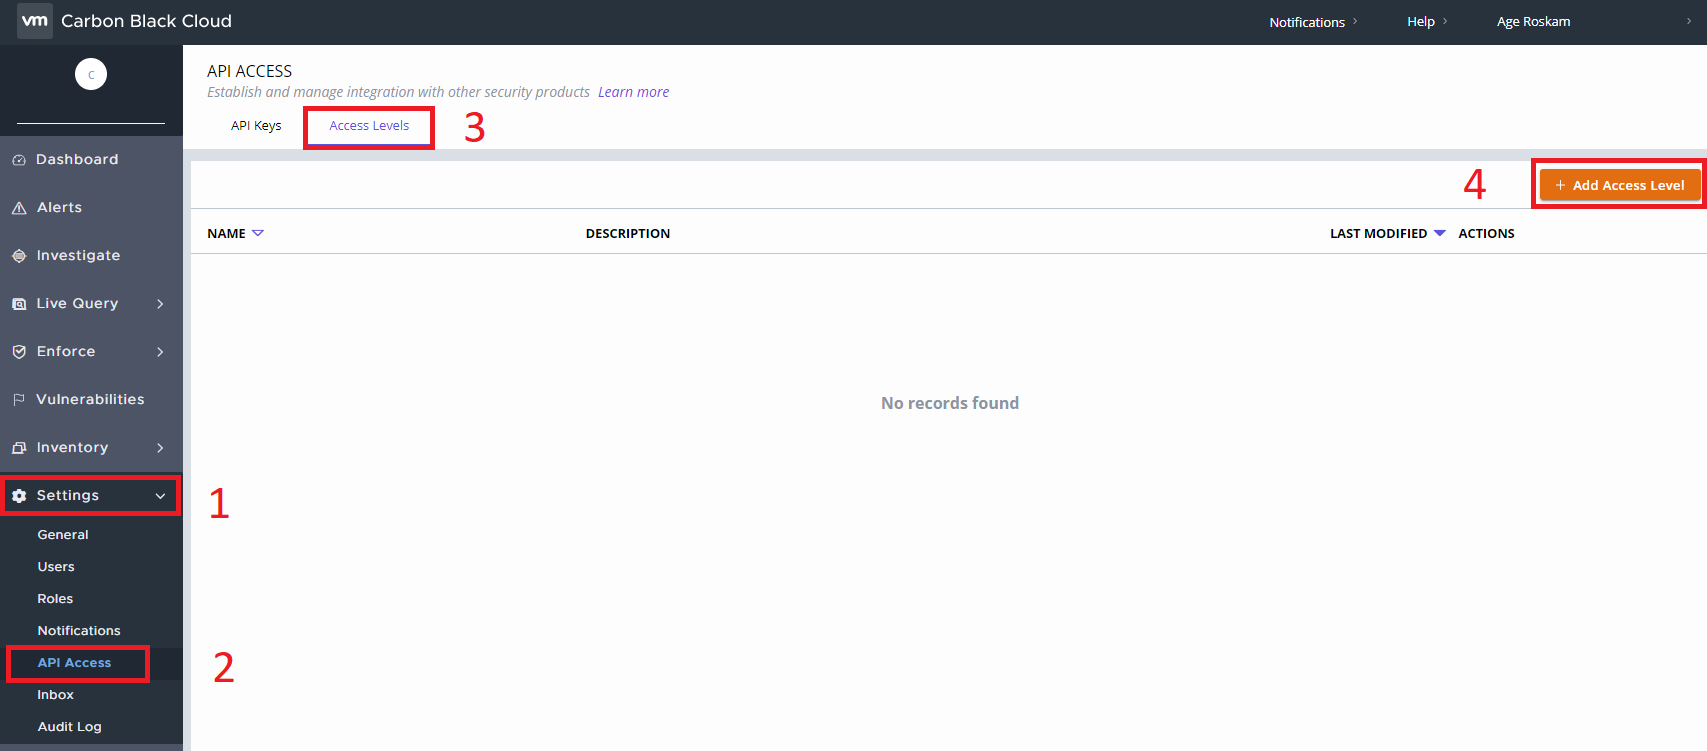
Log in to your Cloud Management page and select Settings > API Access > Access Levels and click the +Add Access Level button.
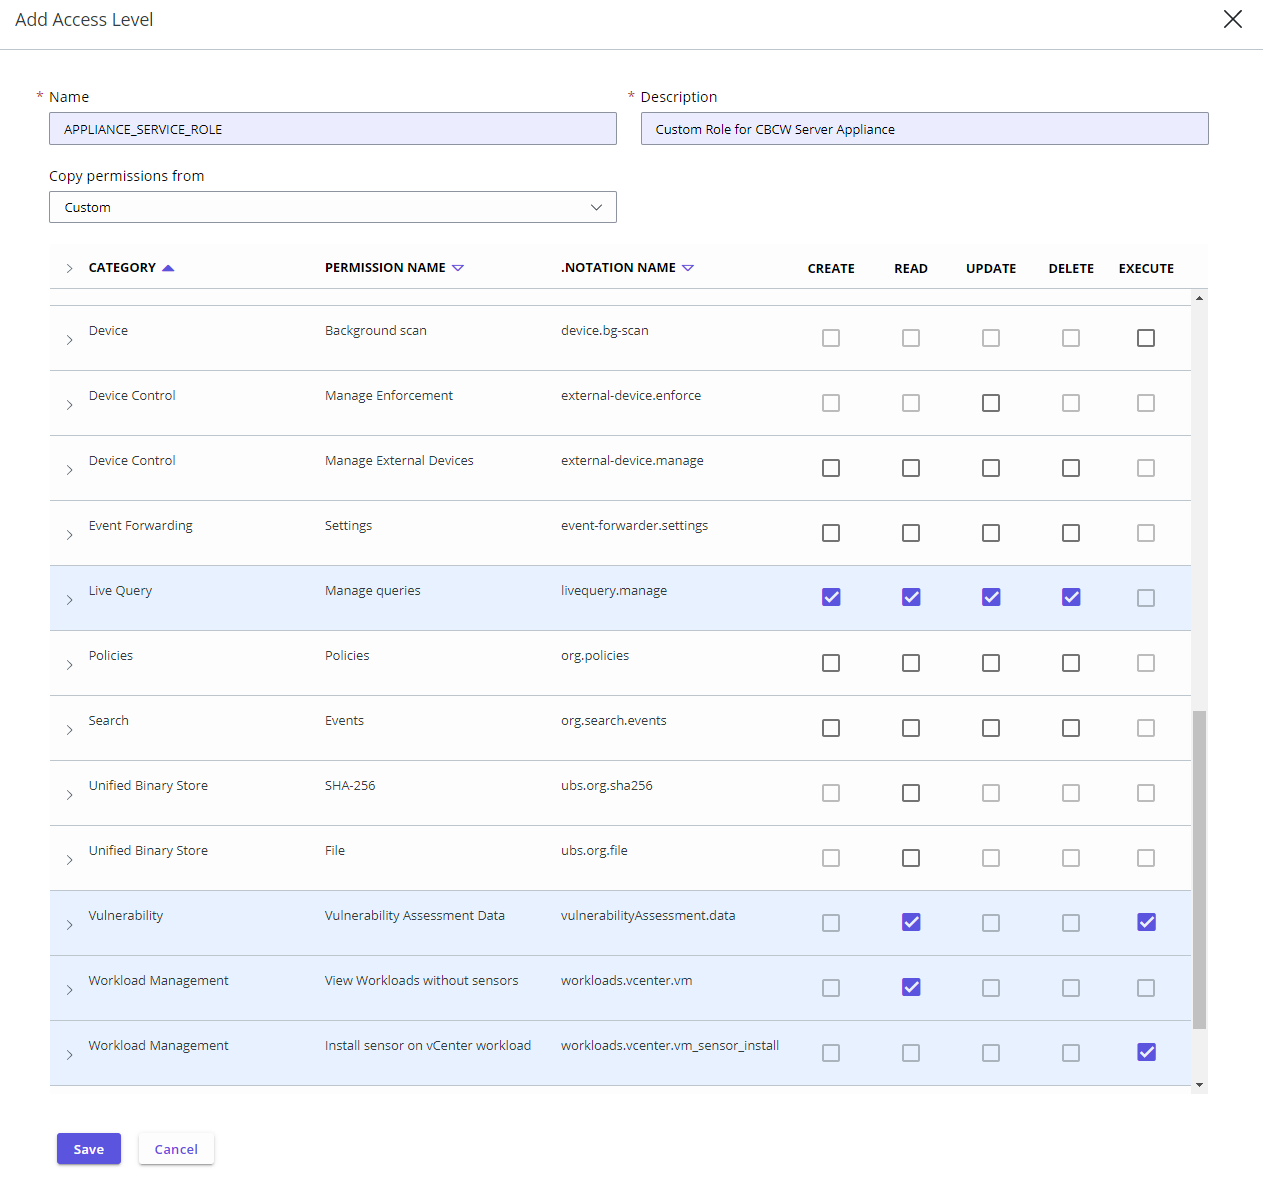
Here you need to enter several details to create a custom access level for the CBCW Server Appliance. Enter a Name, description and select the boxes of the permission functions, and include the following access level.
- Go to Appliances with the permission name as Send workload assets to CBC and select Create.
- Go to Appliances with the permission name as appliance registration and select Create, Read, Update, Delete.
- Go to Device with the permission name as sensor kits and select Execute.
Go to Device with the permission name as general information and select Read. - Go to Live Query with the permission name as manage queries and select Create, Read, Update, Delete.
- Go to Vulnerability with the permission name as vulnerability assessment data and select Read and Execute.
- Go to Workload Management with the permission name as view workloads without sensors and select Read.
- Go to Workload Management with the permission name as install sensor on vCenter workload and select Execute.
Click Save to create the custom Access Level.
Then select the API Keys tab and click the +Add API Key button.
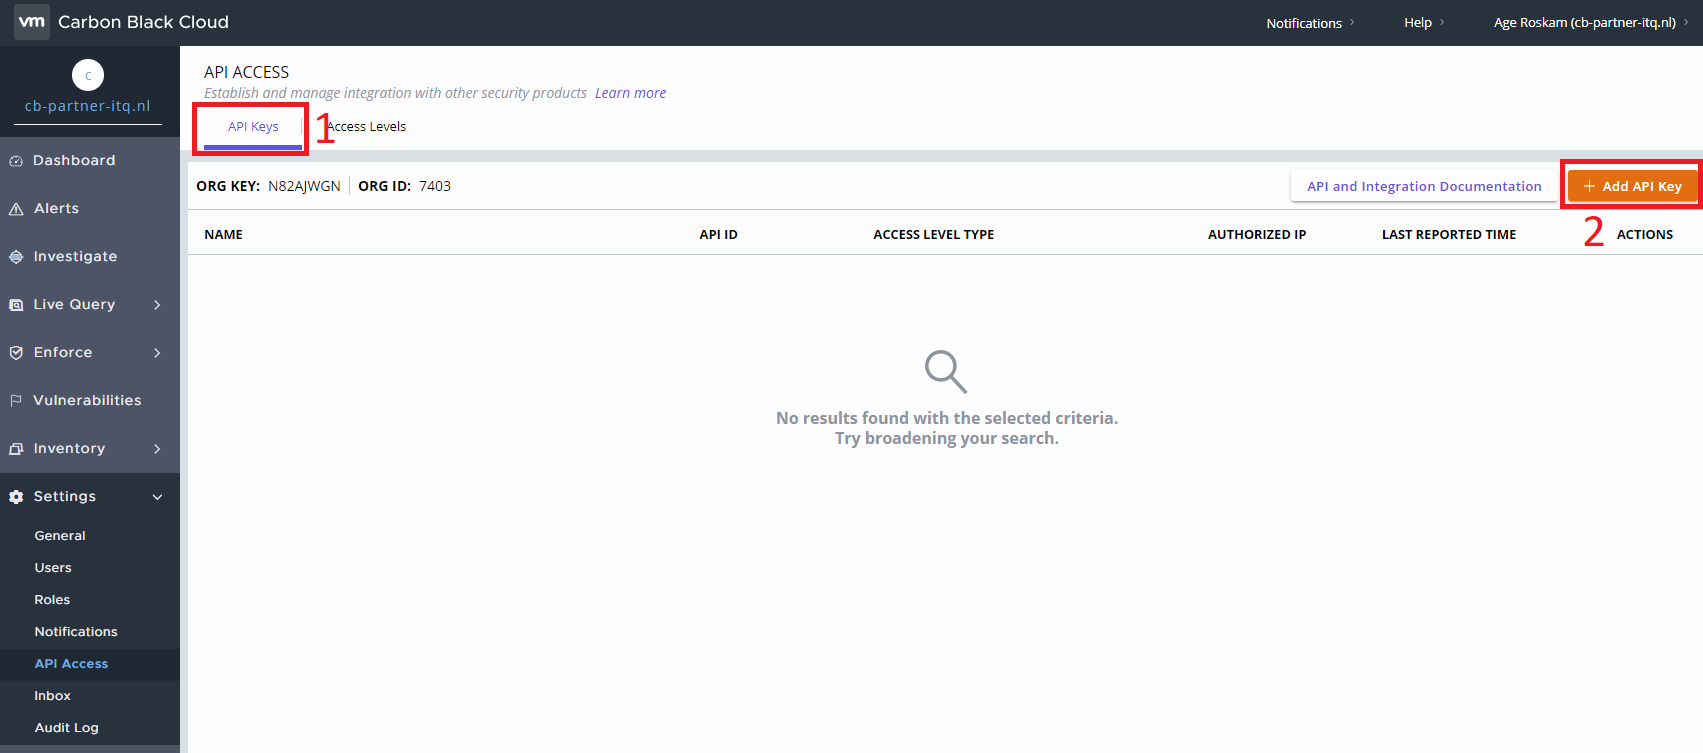
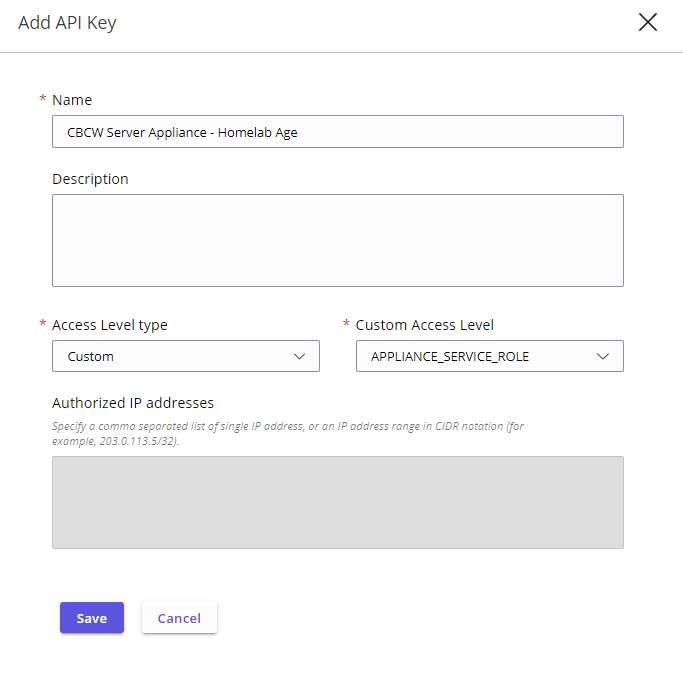
Enter a Name, select Custom from the Access Level Type dropdown menu, select the Custom Access Level you created from the Custom Access Level dropdown menu, and click Save.
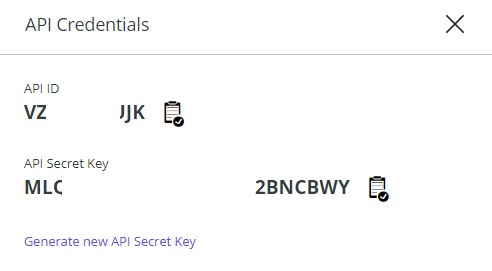
You have successfully created an API key for the CBCW Server Appliance to use.
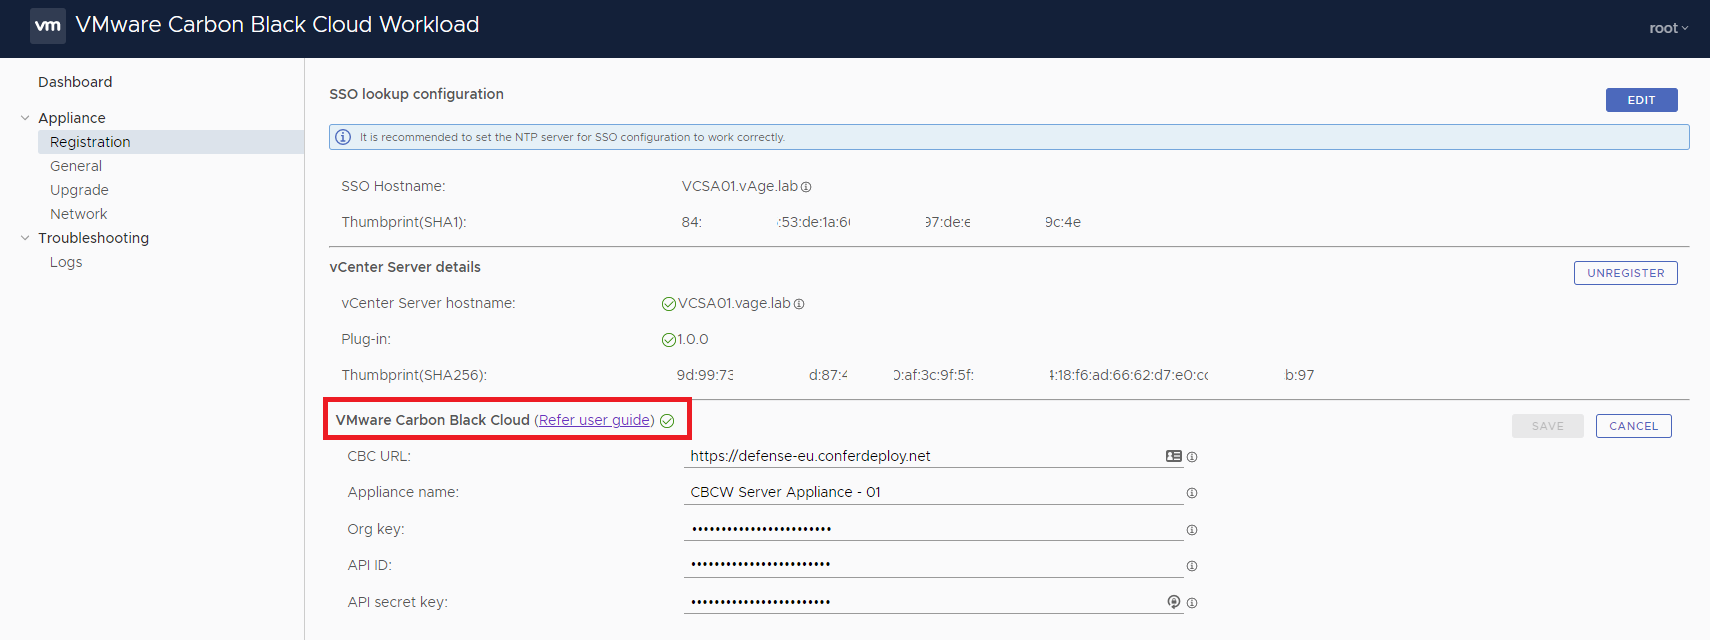
Head back over to the CBCW Server Appliance Management page to finalize the configuration. On the management page, click the Edit button at the VMware Carbon Black Cloud section.
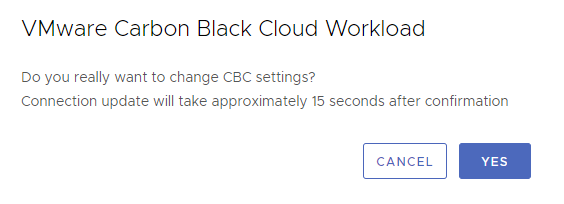
Enter the Carbon Black Cloud URL and create a unique Appliance name. Copy/paste the Org Key, API ID, and API Secret Key from the Carbon Black Cloud Management page and click Save.

Click Yes.
After a couple of seconds, you will see a green checkmark. This means the connection was successful. If the sign is a red exclamation mark, something has gone wrong and you need to check the specified data.
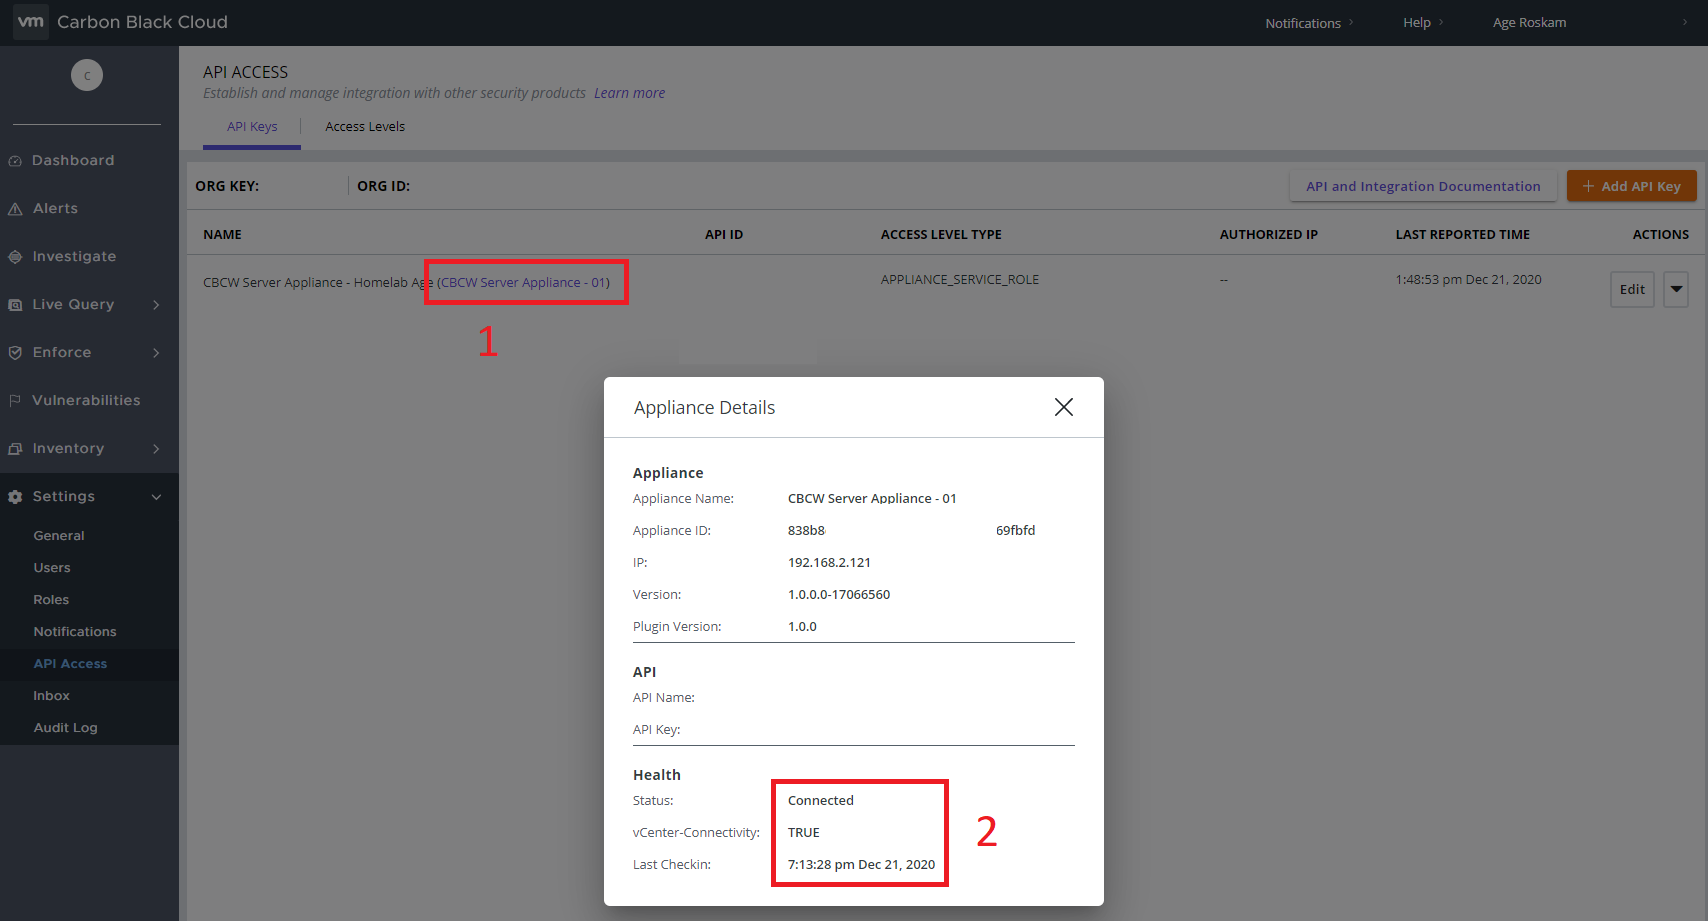
You can also check the active connection in de CBC Management page. Go to Settings > API Access > API Keys and click the link in the API key name.
This was the final part of the configuration. Now it’s time to install the Carbon Black sensors on your workload and start protecting your environment!
Conclusion
The installation and configuration are not that hard, and if you followed the steps correctly you now have enabled Carbon Black Cloud Workload Protection in your environment. Your system administrators and security officers/analysts can now both monitor the environment for possible threats through the Carbon Black Cloud- and vCenter Management pages.
If you are interested in Carbon Black Cloud Workload Protection and want a demo or need help with the installation or configuration feel free to contact me in any way.


Je moet ingelogd zijn om een reactie te plaatsen.